Windows 10 did not have default options to deactivate automatic updates like other previous Windows. This makes Windows 10 to automatically update itself once you are connected to the internet. Some Windows update may need up to one (1) GB of data to complete, imagine if you have only 500MB to browse and Windows just use it for updates. That sound annoying, huh. The good news is you can deactivate Windows 10 from Automatically Updating itself.
How to Deactivate Windows 10 Automatic Updates on WiFi
Are you the type that makes use of WiFi networks (either phone wifi or any other) for browsing on your Computer and will like to deactivate Windows 10 updates? It is very easy, just follow the below steps:
1. Connect to your WiFi Network and Press the Windows button on your Keyboard.
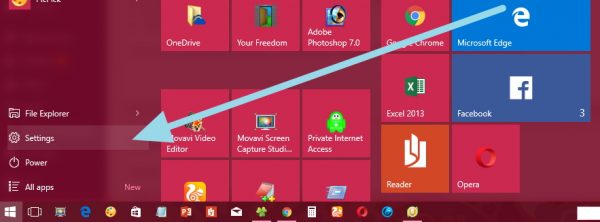
2. Click On Settings just above the Power option on the Start Menu.
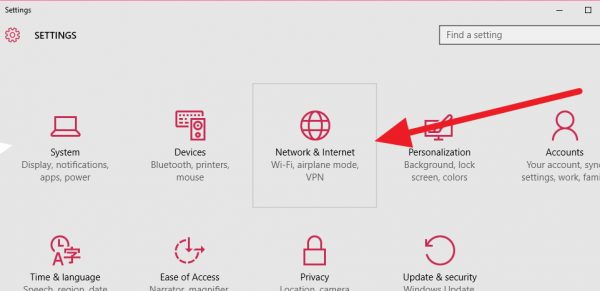
3. On Settings Page, go to Network and Internet section.
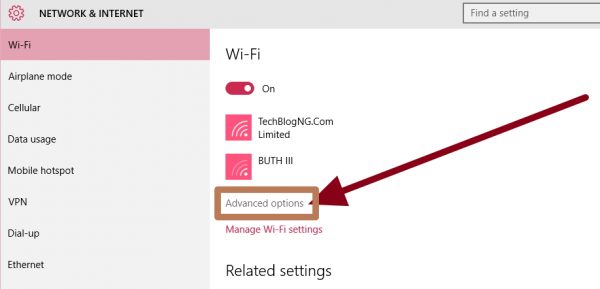
4. On Network & Internet settings page, go to WiFi tab and click on advance options that is placed below active wifi network.
5. Scroll down to the Metered Connection section and activate Metered Connection for your Wireless Network.
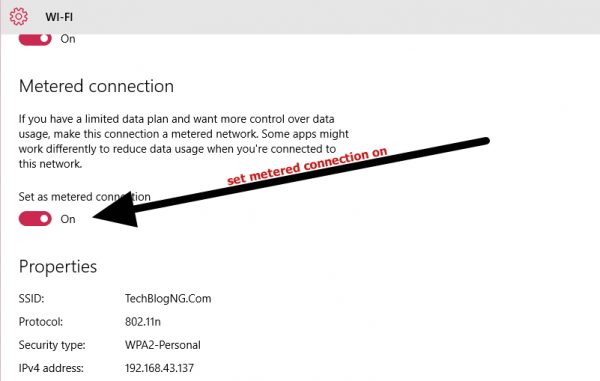
That is all. Once you connect your Windows 10 Computer to that WiFi network, Windows Update will no longer auto download.
NOTE: You have to repeat the steps above for different WiFi networks.
How to Deactivate Windows 10 Automatic Updates When Using Modem or Router
This can only be achieved by putting on the Windows 10 inbuilt battery Saver. Once the battery saver is active Windows 10 will never automatically download Windows Update. Check below on how to activate the battery saver.
How to Activate Battery Saver on Windows 10 Computer
The Easiest way is through the Taskbar that is placed at the bottom of your Computer System Monitor.
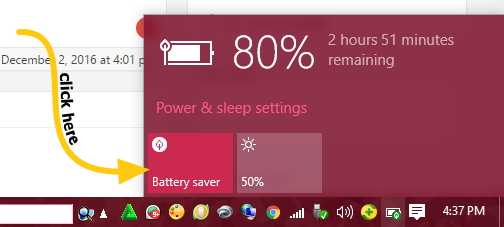
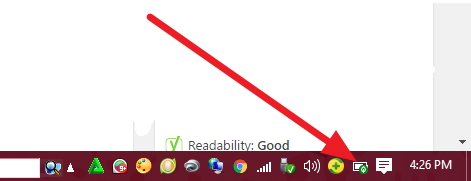
1. Locate the battery icon on your Taskbar and Click on it.

2. A menu will slide up, just click on Battery Saver and you will see a green icon on your battery. This means Windows battery saver is active.
Those are two easiest way to deactivate Windows 10 Updates for Now. Kindly share and save other Windows 10 Users.





Hiide sir,
thanks for this helpful info, i am using limited data plan and it use too much data in this process. now i am able to disable this.
You are Welcome Rakesh.