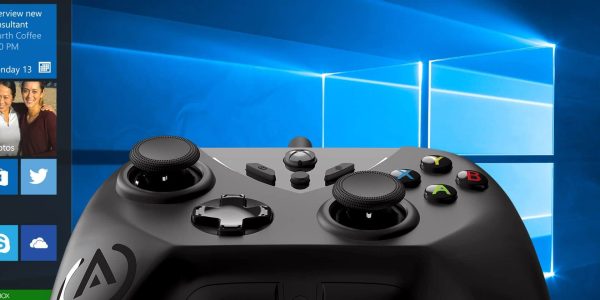
It’s not unusual to see Windows 10 being covered by popular electronic magazines and video game shows on television. Many avid gamers are finding out that Windows 10 is an exceptional OS for video game players because it incorporates many beneficial programs and features with ease. However, just like its predecessor, Windows 10 must be tweaked in order for you to get the best gaming experience. We would be discussing today about how to optimize Windows 10 for gaming. This is also applicable to other Windows versions.
In this article, we will cover several distinct tweaks that will help you optimize Windows 10 with ease. After the tweaks have been made, you will notice that your gaming experience has been enhanced tremendously. It’s also important to point out that these simple tweaks will make it easier for your system to handle intense games with advanced graphics. Please keep in mind that you need the right hardware for these tweaks to be effective.
Many of the tweaks listed in this article require a restart for them to kick in. You may be tempted to try all the tweaks at one time and restart your system, but that would be a grave mistake. Let’s get to it!
Delete Your Old Files Optimize Windows 10 for gaming
Having a ton of old files will make it extremely difficult for you to optimize windows. Make an earnest effort to delete all the unnecessary files on your computer. This includes photos, word documents, and movies. You don’t need these extra files on your computer. They are simply taking up precious space.
If you need some of these extra files for the future, simply transfer them to an external drive or a USB flash drive. You can find these reasonably priced items at any retail store in your town or city. Transferring your files to an external drive or USB flash drive will increase the speed of your machine. This will help you have awesome gaming sessions. Please keep in mind that more space on your computer will give you an opportunity to have more games.
Get Rid of Old Applications
Take a close look at the applications on your computer. Go to the control panel, click on programs, and click on uninstall a program. Look through the list carefully. Select and clean up old applications that you barely use or don’t need. After uninstalling certain apps on your computer, you will need to reboot it to remove everything completely.
Go through your Universal Apps after you have removed the unused apps in your Control Panel. Go to your Start Menu. Carefully look at the Universal Apps in your main Start Area. You should also go browse through the entire list of your apps. You should be able to see the new apps that came with your Windows 10 or the ones you downloaded to your system in the past.
Carefully remove the apps that you aren’t using anymore. They can be removed with ease once you right-click on the apps and select Uninstall. It will be time for you to reboot your system after you have removed the unused apps and files. This tweak may seem complicated, but you can complete this tweak within a matter of minutes.
Update Windows to Optimize Windows 10 for gaming
Your computer should be updated at all times. You should never ignore your computer update messages. Click on Start, go to Settings, and proceed by clicking on Update and Security. Now it’s time for you to select the Check for updates button. At this point, you should carefully run everything that appears. Be ready to reboot your system again. If your system is not prompting for a reboot, you should reboot it anyway to stay on the safe side.
Fine-tune Windows 10 Visual Effects
Microsoft doesn’t spare any cost when it comes to developing its software. The graphical user interface for Windows 10 raises the bar for its competition. It is easy on the eyes and it has beautiful colors. These features are responsible for making Windows 10 the best gaming software package on the market today.
However, the performance is hindered by the effects. Windows must consume the resources to show these impressive effects. In many instances, these effects are really not needed for a decent-performing machine.
Are you interested in having power for your gaming sessions? If so, you should disable these effects. You can do this by going to Start then click on Settings. Type “Performance” in the search box. Carefully adjust the performance and appearance of Windows 10. A box should appear on the screen. Uncheck the effects that you are not interested in using.
Disable Automatic Update and Restart
Windows 10 is designed to update on its own. However, for optimum performance, you should not allow it to download and install updates at any time during the day. You can change the settings on your computer with a few clicks of your mouse if you have Windows 10 Pro. Unfortunately, Windows 10 does not allow you to do this.
Here’s what you need to do: Go to Start then go to Setting. Click on Update and Security. Please keep in mind that you are responsible for taking care of the updates on your system. If it runs into difficulty while trying to change it, simply adjust the active hours by clicking on Change active hours. This will schedule a designated time for your updates and prevent those accidental interferences that are notorious for popping up during a game.
Run Virus and Malware Scans
Everyone hates spyware, viruses, and malware. You should know that these things can slow down your system while they are running in the background. It’s not unusual to pick up malware, spyware, or viruses while browsing the internet. You can pick up one of these nasty items while visiting one of your favourite websites. For example, many popular social sites have adware attached to them.
Make certain you scan your computer for virus and malware with your scanner. It will get rid of the junk that could harm your computer. There’s an old saying, “A scan a day keeps the viruses away!” Getting viruses and malware out of your computer is really needed to optimize Windows 10 for gaming.
Cleaning Your Disk
Have you been using Windows 10 for several months? If so, there’s a strong chance that your system is filled with tons of temporary files and installation files. Running your Disk Cleanup on your system can get rid of them without any problems.
Here’s what you need to do: Press Windows Key + R. A dialogue box will appear on the screen. Inside the dialogue box, type in cleanmrg and carefully press Enter. After the dialogue box pops up, scan every section that you want to remove from your system. This includes temporary files, log files, and etc.
After you are finished, it’s time for you to click on the Clean up system files button. You will be taken to a new section where you will be able to remove previous versions of Windows. You can also update files that were left during post-installation.
Disk Optimization Optimize Windows 10 for gaming
Optimizing disk is one of the ways to optimize windows 10 for gaming. It’s now time for you to optimize your disk. Windows 10 is programmed to do this, but you should take care of this after doing the tweaks to your system. This will defragment your computer’s hard drive so that it will locate files faster and operate faster.
Here’s how you can optimize your disk: Begin by going to Start and click on Setting. Type “Defrag” in the search box. The option of accessing the application will be shown on the screen. You will also see a detailed list of hard drives attached to your system. We will only discuss the C Drive because it powers windows and most of your games are probably installed there.
Highlight your C Drive and click on the Optimize button. Make certain the C drive stays on the select prompt while you press Optimize once more. The process will start to take place.
Nagle’s Gaming Algorithm
Nagle’s Algorithm collects important data packets so that you can have a faster internet connection. You may run into latency issues while playing a game. If this happens, you have to change the Registry to disable it so that you optimize windows 10 for gaming. Please keep in mind that you could harm your computer if you decide to edit the registry. You could also cause major problems with the Windows installation if you’re not careful.
Change Registry Edit to Optimize Windows 10 for gaming
-Go to start, carefully type regedit > Regedit.
-Now it’s time for you to go to HKEY_LOCAL_MACHINE\SYSTEM\CurrentControlSet\Services\Tcpip\Parameters\Interface.
-You will find letters and numbers under Interface that is associated with your Internet Provider Address.
-Now it’s time for you to match your IP Address with the distinct numbers under DhcplPAddress.
-Are you having a hard time finding your IP Address? No worries! Open the Command Prompt and type ipconfig. You will see the IPv4 address on the screen.
-It’s now time for you to right-click that folder and choose New > DWORD (32-bit) Value. Make sure you create two DWORD values.
-You’re almost done. Name the first TcpAckFrequency and the other TCPNoDelay.
-Carefully double-click on both and highlight their parameter value to one.
-Repeat these steps and set the value to 0 if you run into any problems with your network. This will disable them.
-Reboot your machine.
Update Your Drivers to Optimize Windows 10 for gaming
You will not have good gaming sessions if your drivers are not updated. Windows 10 will update some drivers, but you must search for new drivers. We will shed light on the video card drivers. You have to go to your manufacturer’s website to get new drivers. At this time, there are only two primary video card manufacturers (NVIDIA and Radeaon by AMD).
Once you visit the manufacturer’s website, you will be directed to the video card that will be compatible with your system. The manufacturer’s website will also find and download drivers for your system. Install them and reboot your machine. It cannot get any easier than that.
Install DirectX 12
If you have been using Windows 10, you may have this version. If you don’t have it, you can get it by running Windows updates. You can install it on your computer after it’s discovered. At this time, there’s no single installer for the software. You can get it via Windows Update.
Check the version of your software by going to Start > Run > dxdiag > DirectX Version. Do you have 11 or an earlier version? If so, you should get an upgrade so that you can enjoy the new features in DirectX 12.
Final Word on How to Optimize Windows 10 for Gaming Sessions
The tweaks listed above can improve our gaming sessions on Windows 10. Simply try them out and have fun!